Potato Leek Soup with Arugula Cream

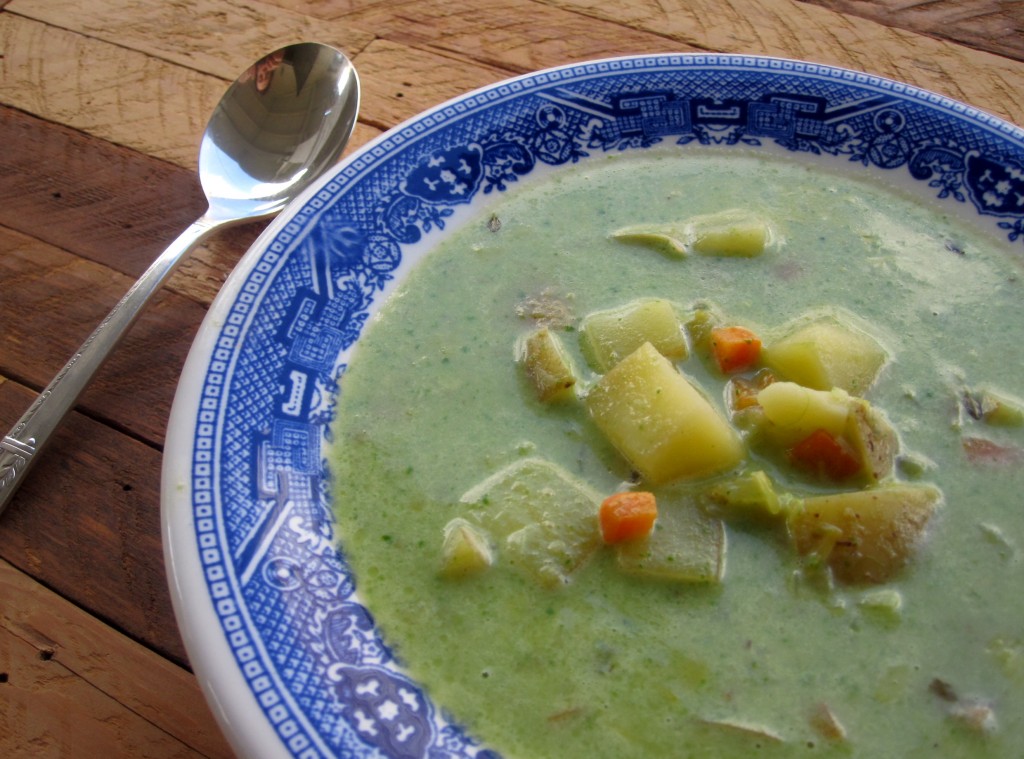
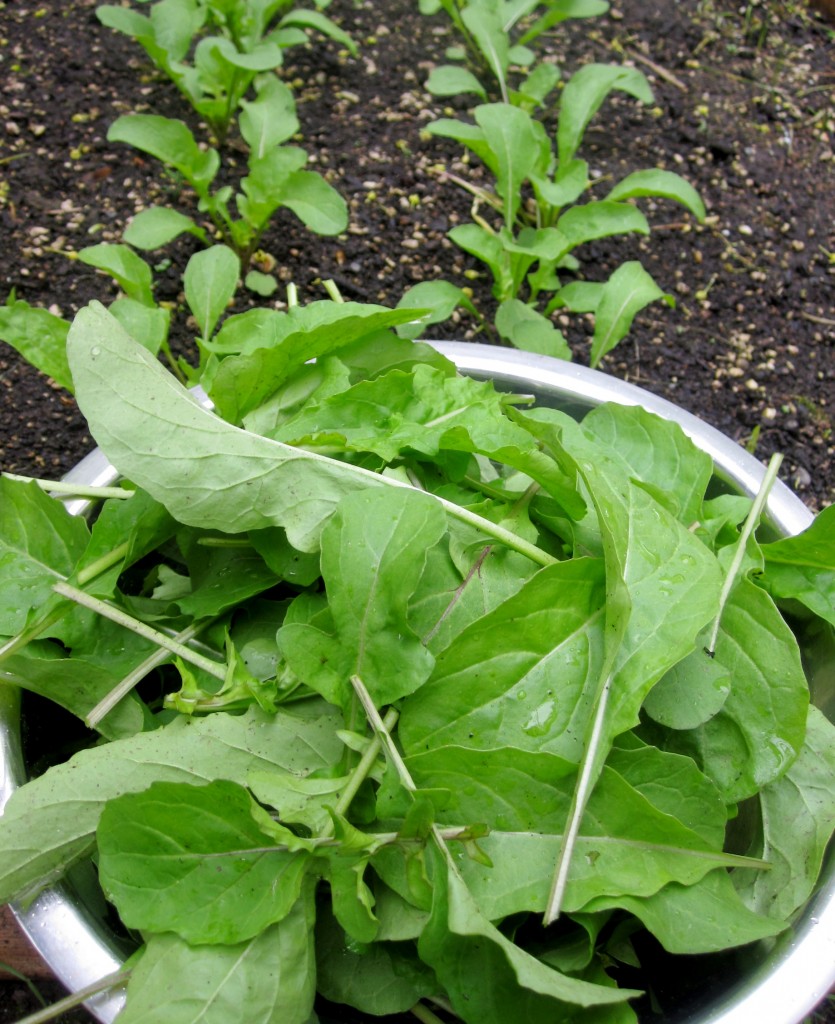
It seems like most of us are still caught up in that strange transition time between good weather and bad weather. It’s been cold enough at night in Portland that I am still craving comforting, wintery foods, but when I look out the window I can see my garden bursting with green shoots and leaves. I created this  recipe in honor of these two realities  – A traditional potato and leek soup finished with a puree of warm half & half and bright, peppery arugula from my garden.

Potato Leek Soup

Making a delicious soup from scratch requires nothing more than good ingredients a little practice. This soup recipe follows what I’ve found to be a fool-proof formula – sauté and season your veggies, deglaze with wine, add your cold stock, herbs, and potatoes, and simmer until very tender. Another key to great soup is *plenty* of salt. I salted this soup three times while cooking, and then again after I added the arugula cream.

We enjoyed this soup with homemade rye sourdough bread, which I wished I had thought to make into croutons for topping the soup. Good thing there is plenty of crappy weather left.

Potato Leek Soup

Potato & Leek Soup with Arugula Cream
*makes 8 servings*

2 Tbsp butter
2 leeks, white and light green parts only, washed and small diced
2 medium carrots, small dice
2 stalks celery, small dice
5 medium cloves garlic, minced
1 C. dry white wine
8 C. broth or stock of your choice
2 sprigs fresh lemon thyme (regular thyme is fine, too)
2  1/2 # Yukon Gold potatoes, medium dice
4 C. firmly packed (but not crushed) arugula
2 C. best quality half and half
S & P

Melt the butter in a stockpot over medium-low heat. Add the leeks and season generously with salt and pepper. Sauté the leeks until quite soft, about 5 minutes. Add the carrot, celery, and garlic and cook a few minutes more until the garlic is fragrant. Add the white wine and increase the heat to medium high. Allow the wine to boil and cook the mixture until the wine has mostly evaporated, 3 or 4 minutes. Add the broth or stock, the potatoes, the thyme sprigs, and more salt and pepper. Cover the soup and bring to a boil. Once boiling, remove the lid and reduce to a simmer. Cook until the potatoes are very tender, anywhere from 20-35 minutes (less if using starchy potatoes like Russets). When the potatoes are done to your liking, turn off the heat.

In another small saucepan, warm the half and half until steaming. Place the arugula in the blender and pour over the warm half and half along with 2 cups of the still hot potato leek soup. Puree until smooth,and then add the blended mixture back in with the rest of the hot soup. Season with more salt and pepper to taste until perfectly delicious.



Posted in gluten free, perfect health diet, soup, vegetarian | Tagged , , , | Comments Off on Potato Leek Soup with Arugula Cream

Corn Cakes with Strawberries and Basil

It’s official – I’ve emerged from my winter cooking funk. Asparagus, rhubarb, and even a few strawberries made their debut at the Portland Farmer’s Market yesterday, and my mind was suddenly flooded with ideas for new recipes.

The strawberries got me thinking about breakfast, which tends to be a tad boring around here. Mr. Tummyrumblr really appreciates the occasional sweet breakfast, and so after months of fried eggs, fried eggs, and more fried eggs, I obliged.

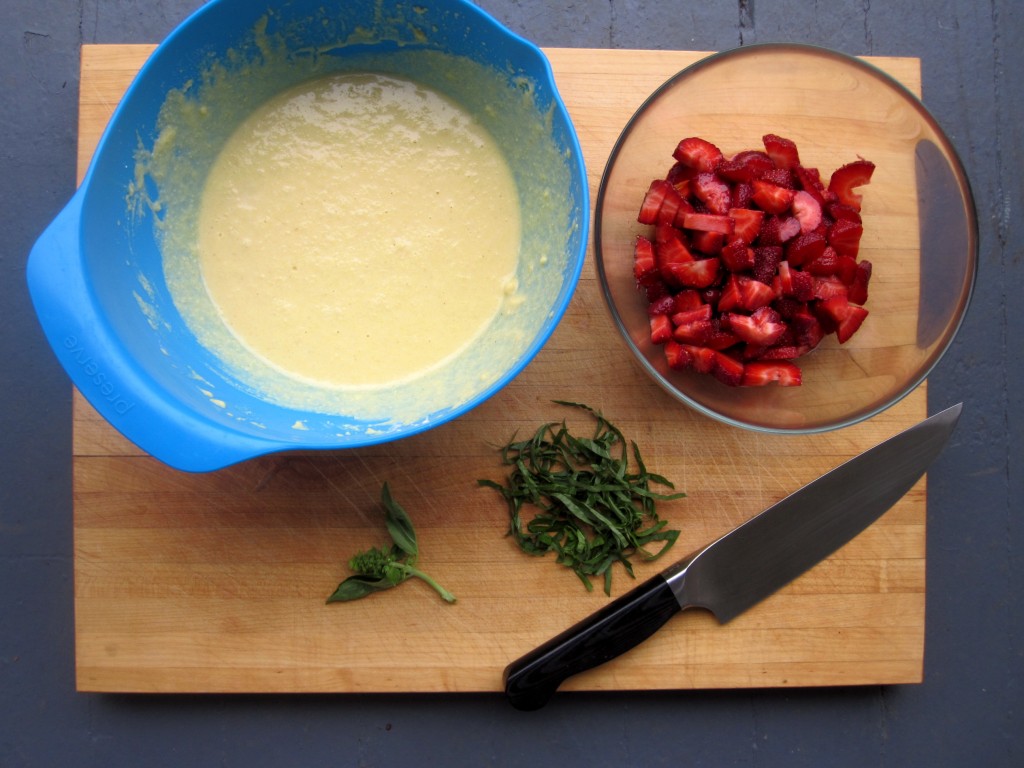
If you’ve never had them together, strawberries and basil make for an amazing pairing. Simply sweeten the berries with a little maple syrup, and they make a delightful topping for these light and fluffy corn cakes. And if you love the combination as much as we do, tuck the idea away for midsummer and serve the berries and basil over cornmeal biscuits with fresh whipped cream. I personally cannot wait!

Corn Cakes

Corn & Cakes
*makes about 20 two inch pancakes*

3 eggs
2 1/2 C. buttermilk
3 Tbsp melted butter
1 tsp. vanilla
2 Tbsp. brown sugar
1 1/3 C. corn flour (I used Bob’s Red Mill’s version)
6 Tbsp. coconut flour
2 tsp. baking powder
pinch salt
butter for frying the cakes

Strawberry & Basil Topping

1 pint strawberries
2 Tbsp. maple syrup
10 medium basil leaves, stacked, rolled up into a cigar shape, and thinly sliced

It’s best to start with room-temperature eggs and buttermilk, so I leave my eggs and measured buttermilk out on the counter before I go to bed.

Whisk the eggs and buttermilk together with the melted butter, vanilla, and sugar until well combined.

In a separate bowl, combine the corn & coconut flours, the baking powder, and the salt to combine. Whisk the dry ingredients into the wet and set aside while you prep the berries. The batter will look thin, but the coconut flour will thicken it as it sits.

 Corn Cakes

Wash the berries and slice them into small pieces. Place in a bowl and toss with the maple syrup to coat. Wait until the last minute to slice and add the basil to prevent discoloration.

The pancake batter should be considerable thickened by now and ready to cook. Heat a wide saute pan or griddle over medium low heat. Once hot, add a pat of butter and allow it to melt and begin to brown ever so slightly.

Scoop the batter into small, 2 tablespoon-sized mounds in the hot butter (the cakes will be difficult to flip if they are too large due to the structure of the batter). Allow the cakes to brown slightly, approximately 2 minutes per side, and then carefully flip them to the other side to do the same. Keep the finished cakes warm in a 200 degree oven while you finish using the batter.

When the cakes are done, slice the basil and toss it gently with the sweetened strawberries. Serve the corn cakes topped with a few spoonfuls of the berries & basil. We agreed that no extra butter or syrup was required.


Posted in baking, gluten free | Tagged , , , , , | Comments Off on Corn Cakes with Strawberries and Basil

Chicken Tagine with Preserved Citrus

You may remember that a few months back I posted a recipe for Preserved Lemons and Limes. That very citrus has been picklin’ away for about two months now, and I used a some of it for today’s recipe: My version of Chicken Tagine.

I had never made chicken tagine before, so I decided to look at a number of recipes and pick and choose the method and ingredients that sounded best to me. Traditionally, chicken tagine is baked in a vessel called a tagine, but I don’t have one. As is the case with the vast majority of life’s culinary conundrums, a dutch oven makes a fine substitute.

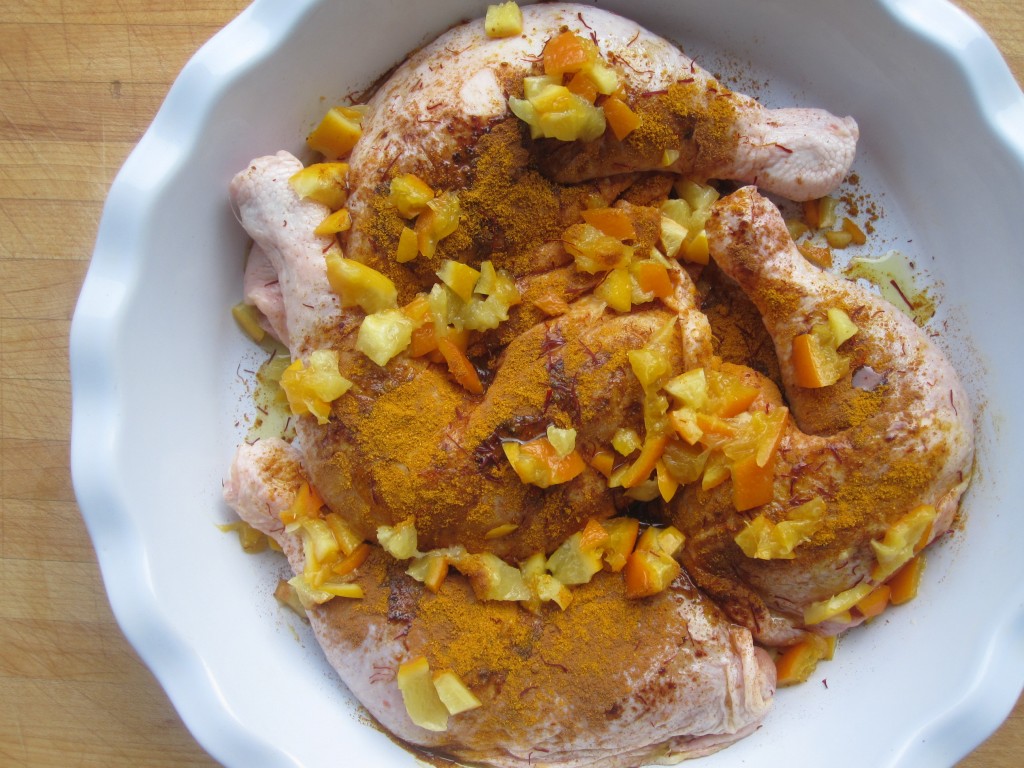
I kept my tagine spices simple and traditional, and allowed the chicken to marinate in them overnight. After browning the chicken, I added olives and dried plums. Dried fruit and olives are both common additions to a tagine, and I happen to be particularly fond of these two fruits together. If they sound like a strange pairing to you, all the more reason to try them. If you don’t have any preserved citrus hanging around, see the end of the post for an alternative using fresh citrus.

This dish turned out wonderfully and I will definitely be making it again. I think it would make a perfect dinner for company served with roasted squash, steamed rice, or in a more traditional manner, with couscous.

Chicken Tagine

Chicken Tagine with Preserved Citrus:
*serves 4*

For the marinade:

4 whole chicken legs
1 preserved lemon or the equivalent (I used ½ a lemon & ½ a rangpur lime)
1 tsp. cinnamon
1 tsp. freshly grated ginger
1 tsp. turmeric
1 pinch saffron, crumbled
2 Tbsp. olive oil
¼ tsp. salt (*or 1/2 tsp. if using fresh citrus)

Place the chicken legs into a baking dish in which they will fit tightly in a single layer. In a small bowl, juice 2 Tbsp. of the juice from the preserved citrus. Discard the rest of the juice and pulp from the citrus, saving the peel. Roughly chop the peel into about ½ “ chunks and add it to the bowl along with all of the spices, the olive oil, and salt. Mix the ingredients until combined.

Pour the marinade over the chicken and massage it all over the skin and flesh. Cover and refrigerate for at least 4 or up to 24 hours.

Chicken Tagine

For the tagine:

2 Tbsp. ghee or olive oil
marinated chicken and citrus (above)
1 medium yellow onion, halved and sliced into rings
12 green olives (whatever variety you like)
6 – 8 dried plums (prunes), halved
½ C. water

Pull the marinated chicken from the fridge 30 minutes before you intend to begin the recipe.

Preheat the oven to 350 degrees. Heat your dutch oven over medium heat and add the ghee or olive oil. Shake any excess marinade from the chicken and pull off any of the citrus chunks, returning them to the bowl for later.

Place the chicken legs, skin side down, into the hot fat and cook, undisturbed, for 4 – 5 minutes or until brown. Turn the legs over and do the same for the second side, then transfer the chicken to a plate (they will not be cooked trough).

Into the same pan, add the onion and the citrus chunks from the marinade. Sauté for another 4 – 5 minutes, stirring often, until the onions are quite soft.

Return the chicken legs to the pan in a single layer and try to spoon the onions and citrus on top of the chicken as best you can. Scatter the olives and plums around the pan and add the water. Allow the water to come to a simmer, and then cover the pan and transfer to the oven. Bake the tagine for one hour. All of the flavors will come together in a lovely way and the chicken legs will be incredibly tender.

*If you don’t have preserved citrus, use 5 or 6 strips of citrus peel and fresh citrus juice for the marinade (I think a little orange and a little lemon would be very nice). Resist the urge to chop the peel finely for the marinade – it will only burn when you brown the chicken. Instead, after the marinating is complete, chop it roughly and add to the pot along with the onions as described in the recipe. Note also that the amount of salt in the marinade increases if using fresh citrus.

Posted in gluten free, paleo, perfect health diet, poultry | Tagged , , , , , , | Comments Off on Chicken Tagine with Preserved Citrus

Warm Kale Salad with Bacon Dressing

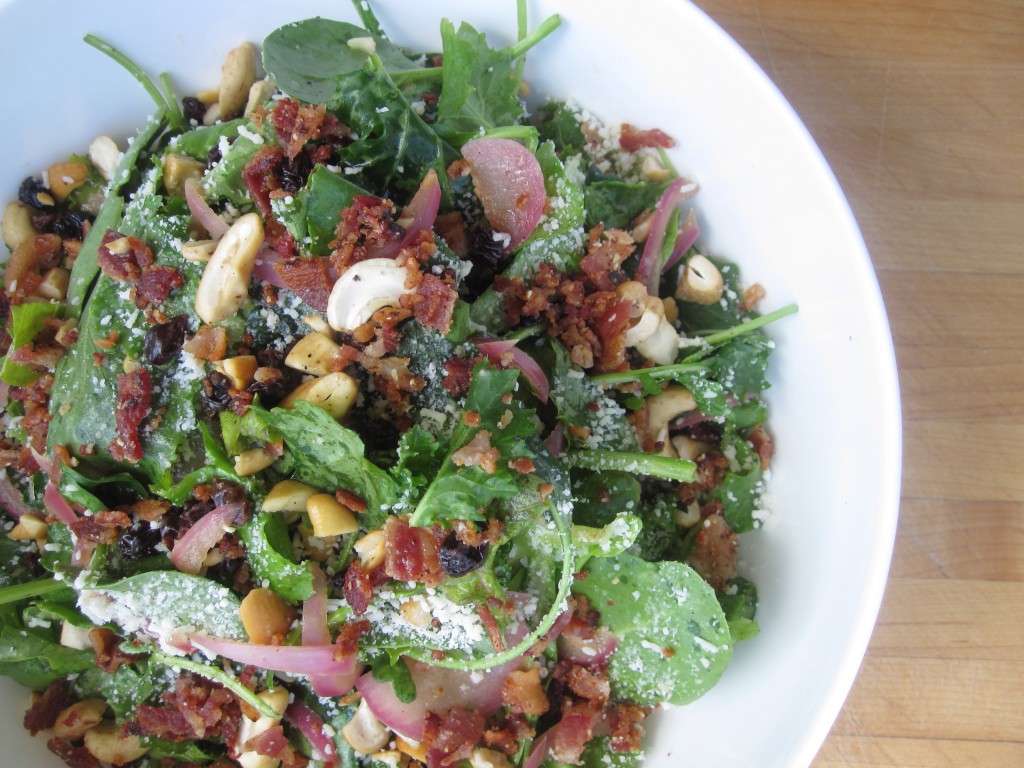
This is a little number I dreamed up after enjoying a delicious warm greens dish at a little restaurant down the street the other night. I love how the warm dressing softens the greens just a little bit, and the combination of sweet currants, salty cashews, and bacon fat really make this salad go down easy.

The salad would be amazing with any number of young greens, alone or in combination – kale, mizuna, chard, spinach, etc. Fortunately all of these things are popping up in backyards and farmer’s markets all over the place in Portland these days (and it won’t be long if you’re somewhere colder, I promise!).

Mr. Tummyrumblr and I divided this bowl between us and enjoyed it as a light lunch. I think it would also make a perfect side dish for a simple dinner of steak and baked potatoes.

Wark Kale Salad with Bacon

Warm Kale Salad with Bacon Dressing
*serves 2*

4 slices thick cut bacon
½ a medium red onion, thinly sliced
2 -3 Tbsp. apple cider vinegar
2 Tbsp. dried currants
about 6 oz. baby kale or other early spring greens (a medium bowlful)
⅓ C. roughly chopped roasted & salted cashews
2 Tbsp. finely grated Parmigiano Reggiano
salt & freshly ground black pepper

Cook the bacon strips over medium low heat until crisped to your liking.

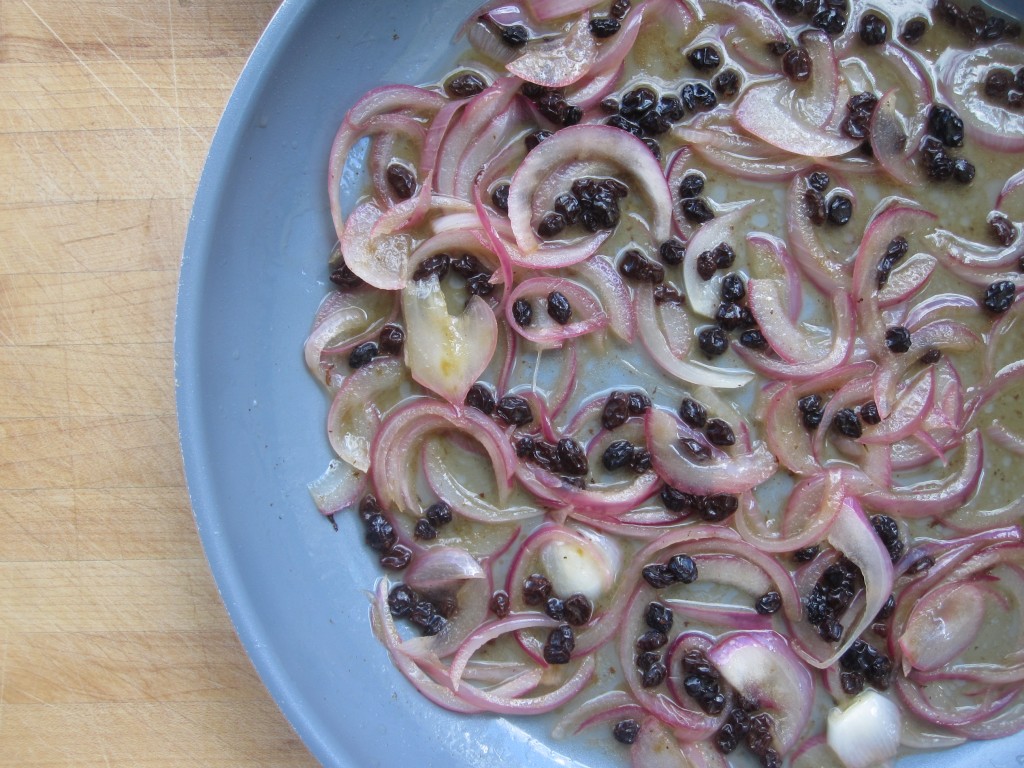
Set the cooked bacon aside and place the sliced onion and currants in with the bacon fat that remains in the pan (let’s hope there are at least 2 Tbsp. or you might want to buy some different bacon). Allow the onions to soften and the currants to plump – about a minute should be fine. Add the apple cider vinegar, tasting to find an acidity that you’re comfortable with. Then bring to a simmer and then turn off the heat.

Warm Kale Salad with Bacon

Place your greens into a large bowl and pour over your warm dressing. Chop the bacon and add it to the bowl along with the cashews and grated cheese. Season the salad with a good pinch of salt and plenty of freshly ground pepper, and toss together gently to distribute the dressing.

*Some great substitutions for the currants would be dried cranberries, chopped dried cherries, or even chopped fresh green apple.

Posted in gluten free, perfect health diet, salad | Tagged , , , , , | Comments Off on Warm Kale Salad with Bacon Dressing

Grandma Ginsberg’s Chopped Liver

I don’t actually have a Jewish grandmother, but my friend Joey does. Joey heard me waxing poetic about the health benefits of liver at dinner one night and he was nice enough to share his grandmother’s version of this classic Jewish recipe with me.

Grandma Ginsberg’s version is mostly traditional, but I love that she throws a sprinkling of caraway seeds in the mix. After I browned the livers and caramelized the onions in the traditional manner, I couldn’t help myself from deglazing the pan with dry vermouth. This step wasn’t part of Grammy’s original recipe, and I hope she can forgive me.

Chicken liver is my favorite variety of liver. It has a milder flavor than other types of liver that I find very comforting. I developed a taste for it as a kid when I was anemic and had to eat it regularly, and now that it’s back on menus everywhere, I find I can rarely say no.

Chopped Liver

Grandma Ginsberg’s Chopped Liver
*serves 4 – 8, depending on your tolerance*

4 eggs, hard boiled and peeled
2 Tbsp. butter (you can use schmaltz if you’re a purist or bacon fat if you’re a corrupter)
1# pastured chicken livers
1 medium sweet onion, small dice
¼ C. dry vermouth (white wine is a good alternative)
2 tsp. caraway seeds, toasted
2 Tbsp. freshly squeezed lemon juice (from one lemon)
freshly chopped Italian parsley
S & P

Boil the eggs to your liking and allow to cool (this step can be done in advance, or alternatively while your cooked livers cool).

Trim the livers of any strange bits, rinse them under cold water, and place on paper towels to dry, patting them of any excess moisture.

Heat a wide sauté pan over medium heat and melt your fat of choice in the pan. When the fat is hot, season your livers lightly with salt and pepper and place them into the pan, an inch or so apart from each other. Allow them to brown nicely on the first side, undisturbed, for 2 or 3 minutes. Once they have some good color, turn them over to brown on the other side (*Tip: turn the smaller, thinner livers first and allow the thicker ones to cook a bit longer).

Chopped Liver

Brown the livers on the second side, but don’t overcook them. A few minutes should be plenty, and if they are still a little pink don’t worry – they’ll be added back to the pan shortly. Remove the livers and set aside on a plate.

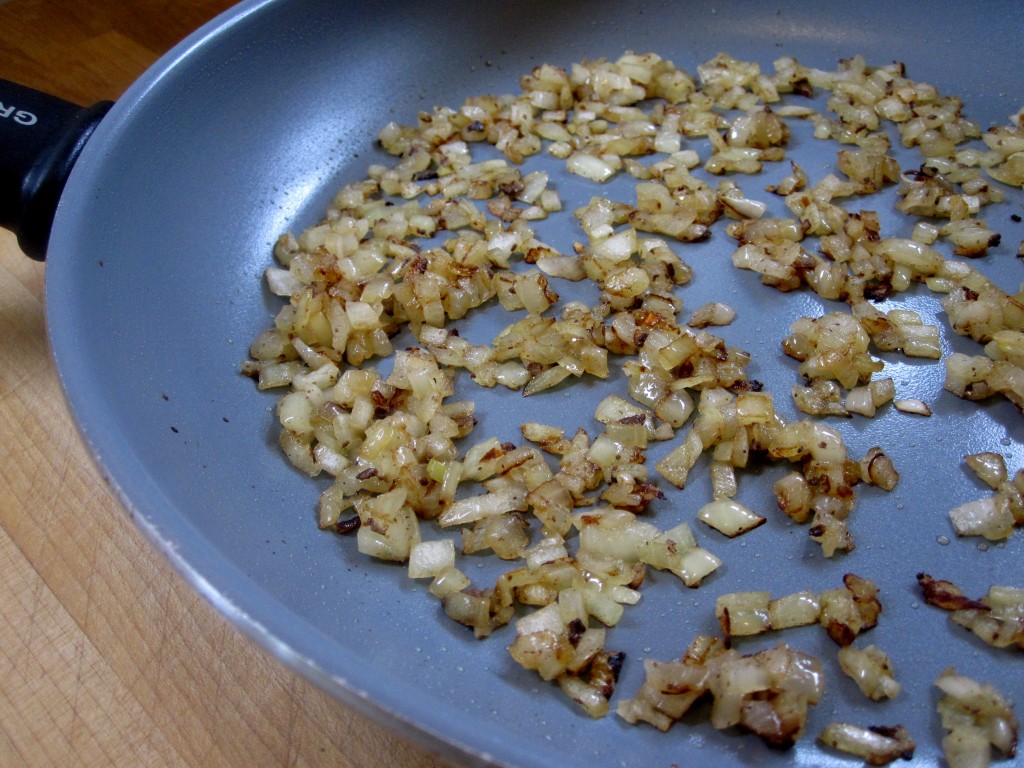
Add the onions to the pan, season generously with salt and pepper, and cook, stirring often, until nice and brown, at least 5 minutes.

Chopped Liver

When the onions are caramelized, return the livers and any of their liquid to the pan and deglaze with the vermouth, stirring to dredge up any nice bits that have stuck to the bottom of the pan. Allow the vermouth to cook off for a few minutes, stirring the livers and onions together. When the pan is nearly dry, transfer the liver and onions to a medium bowl and allow to cool on the counter for 15 minutes. Then transfer the bowl to the fridge to cool fully, at least one hour (this is your second chance to hard boil and cool your eggs).

When the liver and eggs are cool, it’s time to chop them. I chopped them by hand, separately, and then mixed them together. If you prefer to use a food processor, simply chop the eggs and liver into more manageable pieces (half an inch or so), and them pulse them in the food processor until just combined.

Return your chopped liver, onions, and eggs to the bowl and add your toasted caraway seeds, lemon juice, and parsley, and toss gently to combine. Season to taste with more salt and pepper (and more lemon juice, if desired).

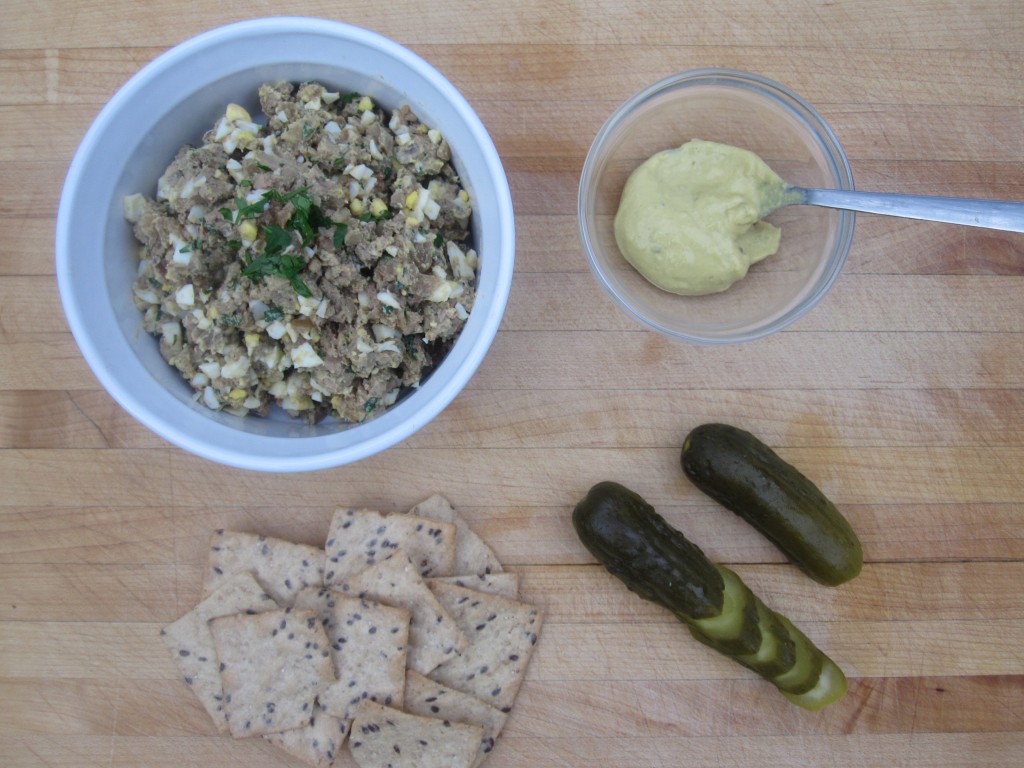
Serve the chopped liver on crackers, bread, or with vegetables. We particularly liked each bite to include a little mustard, a pickled onion or a slice of a Bubbie’s Kosher Dill.

Chopped Liver

Posted in gluten free, paleo, perfect health diet, poultry | Tagged , , , , , , , | Comments Off on Grandma Ginsberg’s Chopped Liver

Cochinita Pibil (Yucatecan Pork Baked in Banana Leaves)

Cochinita Pibil is a traditional preparation for pork with origins in Mexico’s picturesque Yucatan Peninsula. In this version, big hunks of pork shoulder are marinated in fresh, sour orange juice and crushed achiote seeds and then wrapped in aromatic banana leaves. The dish is traditionally pit roasted, and while I would have loved to have made my version totally authentic, I doubt my landlords would have appreciated a giant hole in the backyard.

As an alternative, I baked my pork in a moderately hot oven for about three hours and it came out perfectly. A grill with a temperature gauge would make a great (and perhaps slightly more authentic) option. Just do your best to keep the temp. at around 325 degrees.

Be sure to make a batch of these pickled onions while the pork is roasting. They’re so simple and they make a great addition to this dish as well as many others, including my all-time favorite recipe from the blog, Chorizo Jibaritos.

Cochinita Pibil

Cochinita Pibil
*makes 8-10 servings*

3 # pastured pork shoulder, cut into big ol’ 3-4 inch chunks
3 packed tablespoons achiote paste
3/4 C. Seville orange juice (from about 5 Seville oranges)*
5 large garlic cloves, peeled and thinly sliced
2 tsp. dried Mexican oregano
1 cinnamon stick, cut or broken in half
1 Tbsp. coarse salt
1 16 oz. package frozen banana leaves, thawed for one hour on the counter or overnight in the refrigerator
*If you cant find Seville or other sour oranges, substitute half fresh squeezed orange and half fresh-squeezed lime juice.

Preheat the oven to 325 degrees. Cut pork into chunks and place into a large bowl.

In a second small bowl, whisk together the crumbled achiote and orange juice until well combined. Add the garlic, oregano, cinnamon, and salt and mix again to incorporate the spices.

Pour the spice mixture over the meat and toss together gently to coat all of the meat. Be sure to wash your hands immediately – the achiote will stain your fingers.

Cochinita Pibil

Open the package of banana leaves and gently unfold them.  Each leaf has one long edge with a tough, brown rib that must be removed. Using scissors, carefully cut these ribs from the leaves trying not to tear them.

Choose an oven proof baking dish large enough to hold all of the marinated pork easily (I used a 9 x 13 ceramic dish). Lay 7 or 8 banana leaves across the dish, in various overlapping patterns, to make a sturdy bed for the pork. It’s important that there is nowhere for the marinade to escape, so be sure to layer carefully over any tears in the leaves. Be sure to leave enough of the leaves overhanging the dish so that the top can be covered before baking.

Pour the pork and all of the marinade into the center of the leaves, and then gently fold the outer edges in to cover the meat, tucking them in on the opposite sides of the pan. You may want to tie the package off with some twine (see below), but it’s not totally necessary.

Cochinita Pibil

Place the pork into the oven and bake for 3 – 3 1/2 hours. When the dish is done, the banana leaves will become toasted and brittle, and the pork will become meltingly tender.

Serve the Cochinita Pibil with crumbled queso fresco, fresh cilantro, pickled onions (recipe below), and fresh corn tortillas, if desired.

Pickled Red Onions
*makes one pint*

1 C. apple cider vinegar
¾ C. water
1 cinnamon stick
3 whole cloves
2 bay leaves
1 medium red onion, sliced into thin rings

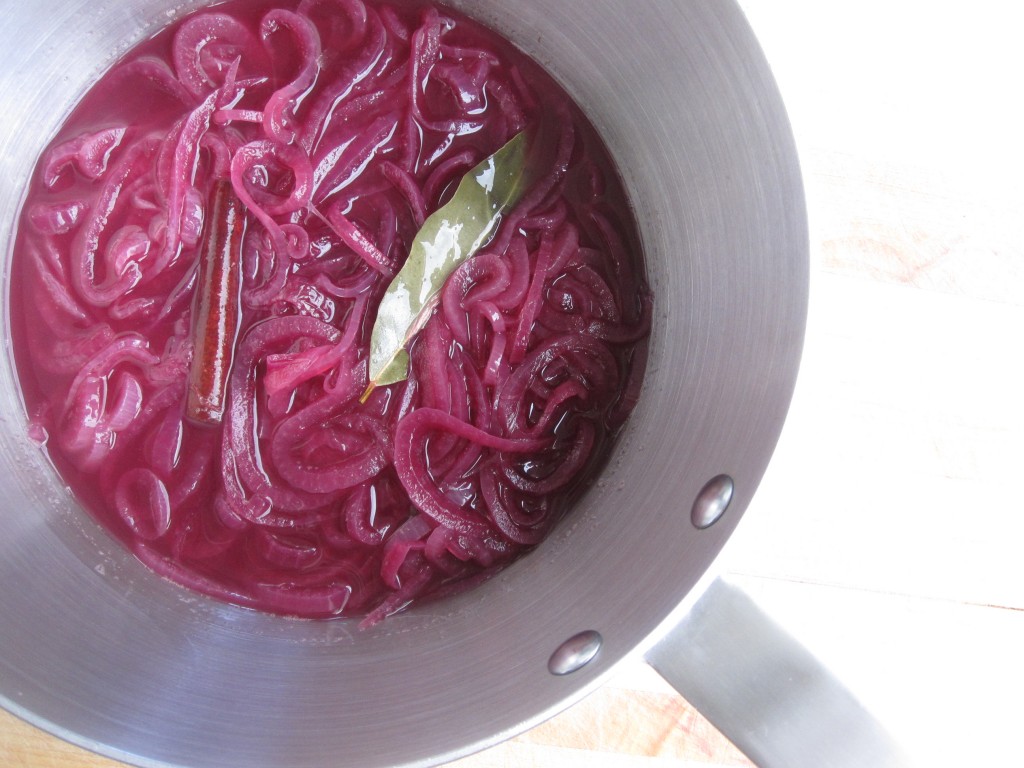
In a small saucepan, bring the vinegar, water, and spices to a boil over medium heat. Add the sliced onion stirring and turning the slices often until they have softened enough to be fully submerged in the vinegar. Cover the pot and turn off the heat.  Allow the onions to sit in the liquid for at least one hour and then transfer to a pint jar with all of the liquid. Store in the refrigerator for up to two weeks.

Pickled Red Onions

Posted in gluten free, paleo, perfect health diet, pork | Tagged , , , , , , , , | Comments Off on Cochinita Pibil (Yucatecan Pork Baked in Banana Leaves)